
Jira is already tidy by design. You get a menu bar with a set of fixed links – but those come either from the system or straight from plugins. Now suppose you always work in the same project, raise countless tickets for that one project, or work with tools outside Jira (Hubspot or Confluence, say). Or you want to give your users direct access to internal support. That is exactly when you can add quick links – buttons, images or other text elements – right below the Jira menu.
You do that in the system settings, under User interface → Announcement banner.
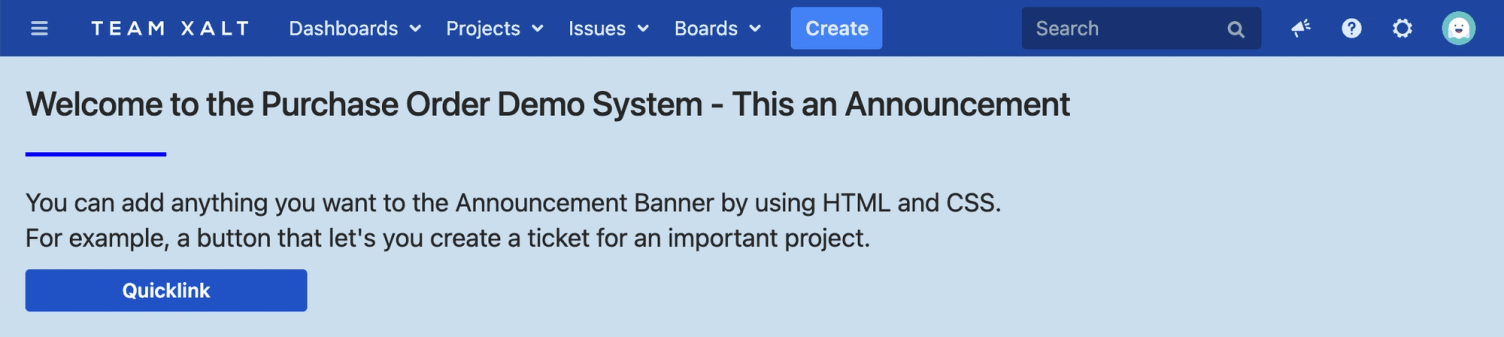
What is the announcement banner and how does it work?
As the name says, the announcement banner is mainly there to make – well – announcements to all Jira users. What you announce is up to you. At XALT, and at several of our customers, the banner is used mostly for internal news that matters: system changes, updates, new plugins.
On top of that, we use the announcement banner at our partners to offer a quick link as a button, which makes raising a ticket for one specific Jira project much simpler and faster.
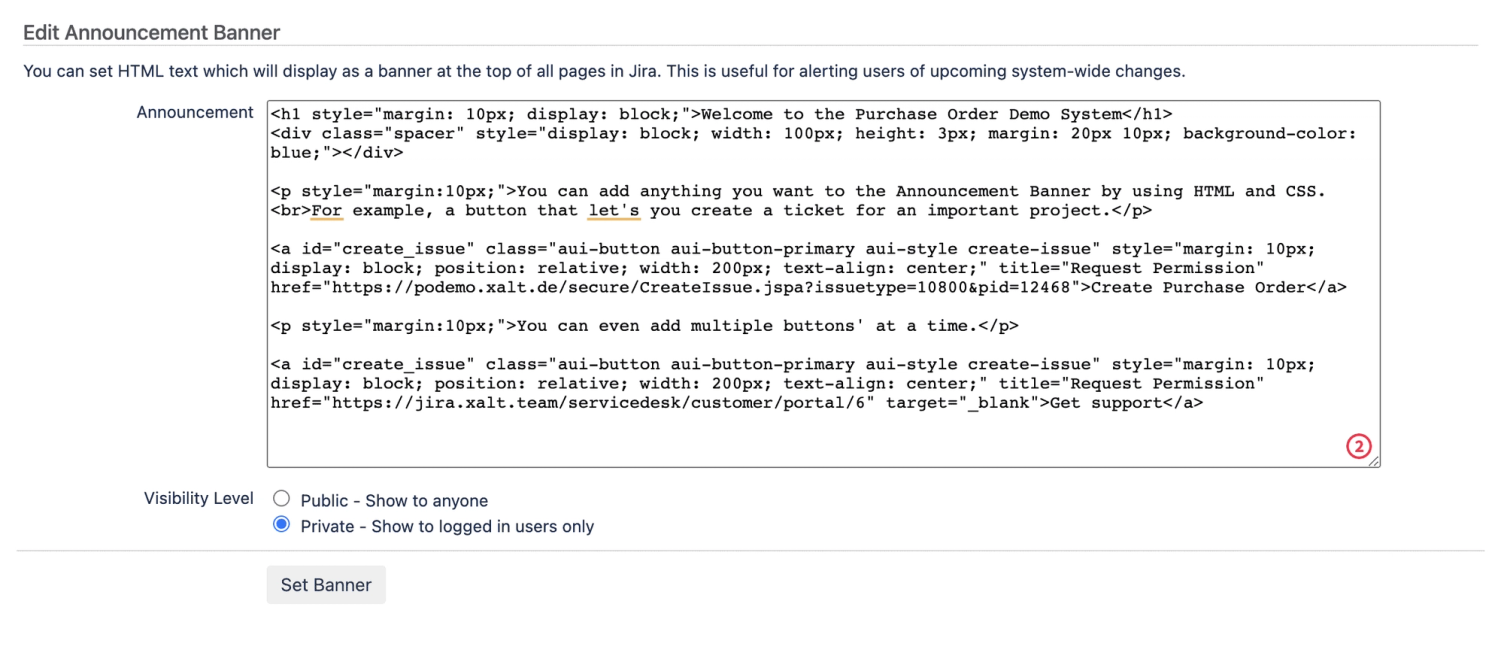
How does the announcement banner work?
The announcement banner is built from HTML and CSS, so basic knowledge is enough to design it and change it at any time. Go to the system settings, look for User interface in the left-hand menu and click Announcement banner.
From there you can shape the banner however you like. Jira also lets you show it to logged-in users only, or publicly – that is, to everyone.
Pro tip: keep several templates and code snippets ready so you can swap the content or the design whenever you need to.
How to add a quick link as a button
Jira's interface already ships some useful HTML elements and classes you can reuse. To find out which classes work as a button, open your browser's developer tools (F12) and inspect the element you want to put in the banner. In our case, a standard Jira button, these are the classes it uses.
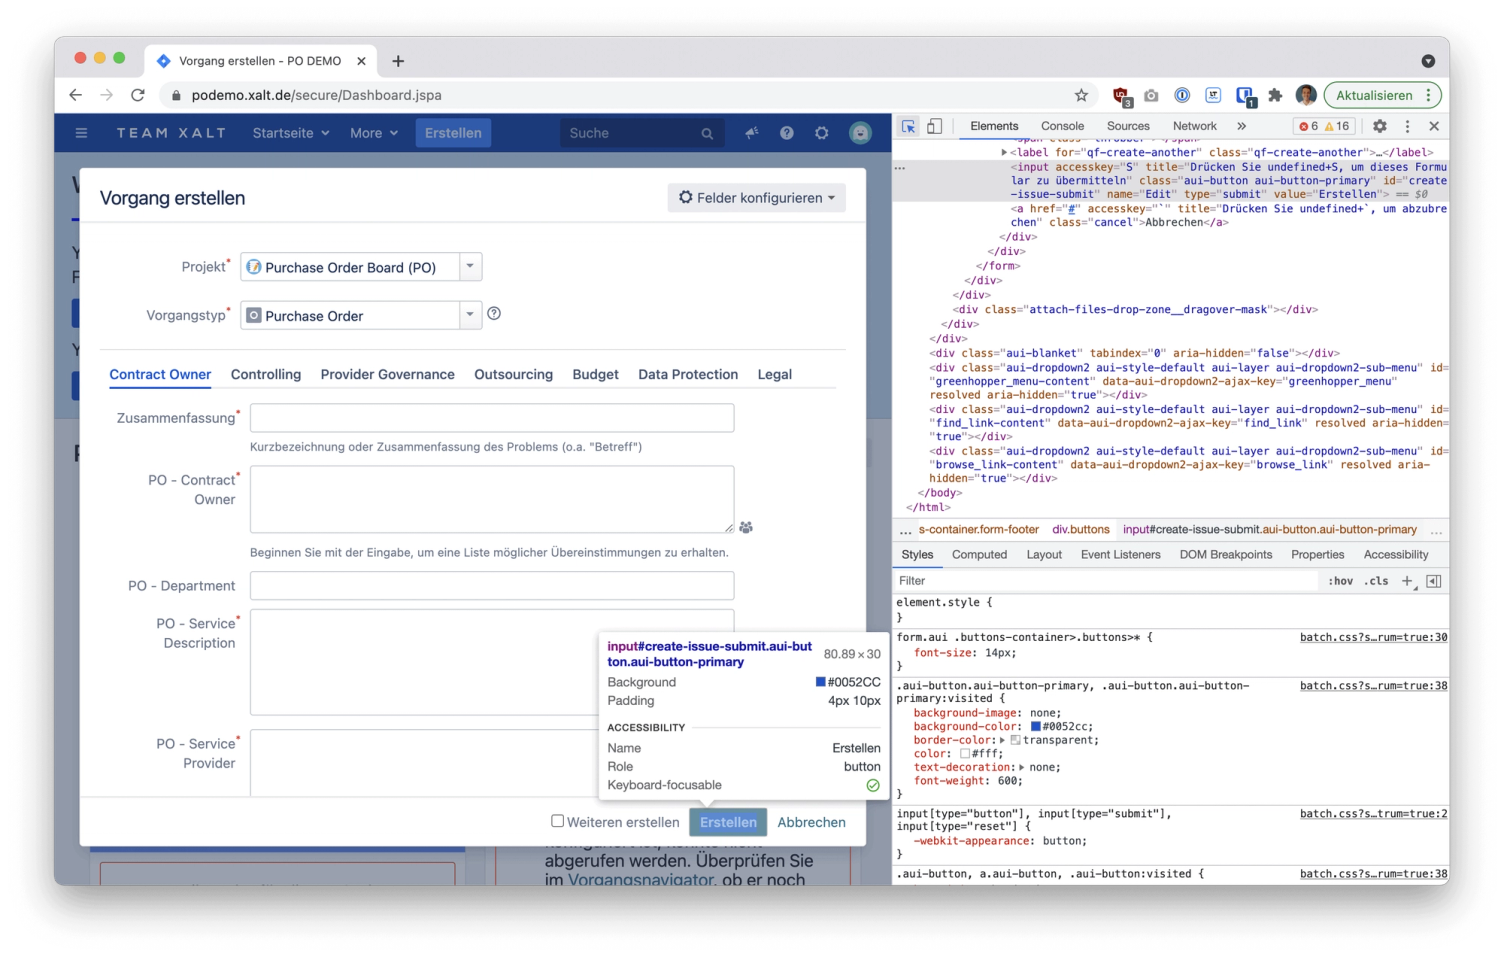
.aui-button.aui-button-primary, .aui-button.aui-button-primary:visitedYou then use that class while building the quick link.
Pro tip: write your own classes and use custom CSS to style every element the way you want it – or the way your branding wants it.
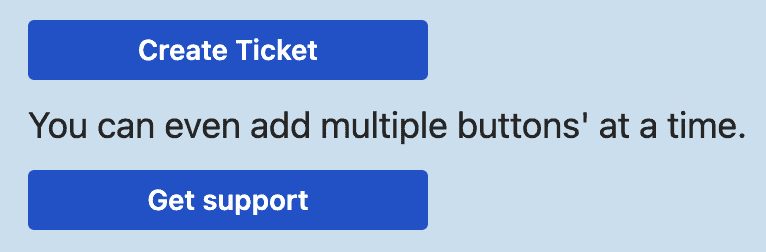
To build this button, for example, you can use the following code:
<a id="create_issue" class="aui-button aui-button-primary aui-style create-issue" style="margin: 10px; display: block; position: relative; width: 200px; text-align: center;" title="Request Permission" href="[Füge hier deinen Link ein]">Beispiel Button</a>To point the quick link at raising a ticket in a project, you first need the ID of the Jira issue type you want to create. Go to the issue type overview in the admin settings and find the issue type you want to address. Hover over the “Edit” button and read the URL your browser shows in the bottom left. Note down the ID.

After that you only need the project ID. You find it in the project overview in the admin area. In the overview, go to the Actions column, click the three dots and hover over “Edit” again. From there it works the same way as the issue ID.
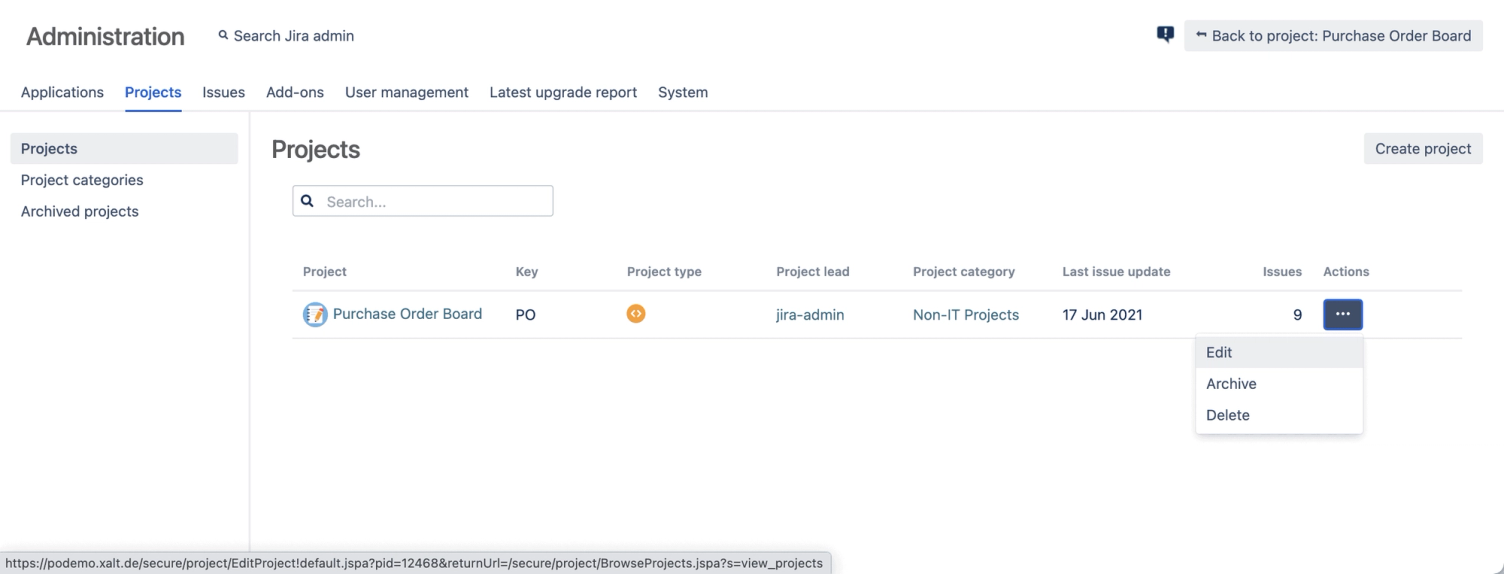
The link should then look like this:
https://example.domain.de/secure/CreateIssue.jspa?issuetype=12345&pid=12345Once your button is finished, click “Set banner” and the interface updates automatically. Happy with the result, and the quick link does what it should? Perfect.
Add more elements to the announcement banner
You can of course use the feature for more than that, and add whichever elements you like.
Adding text elements – headings, paragraphs and more
To add simple blocks of text with headings, the standard HTML tags are your best bet: <h1>, <h2>, <h3>, <p> – or, for simple links, <a>.
That is how you build the design below:
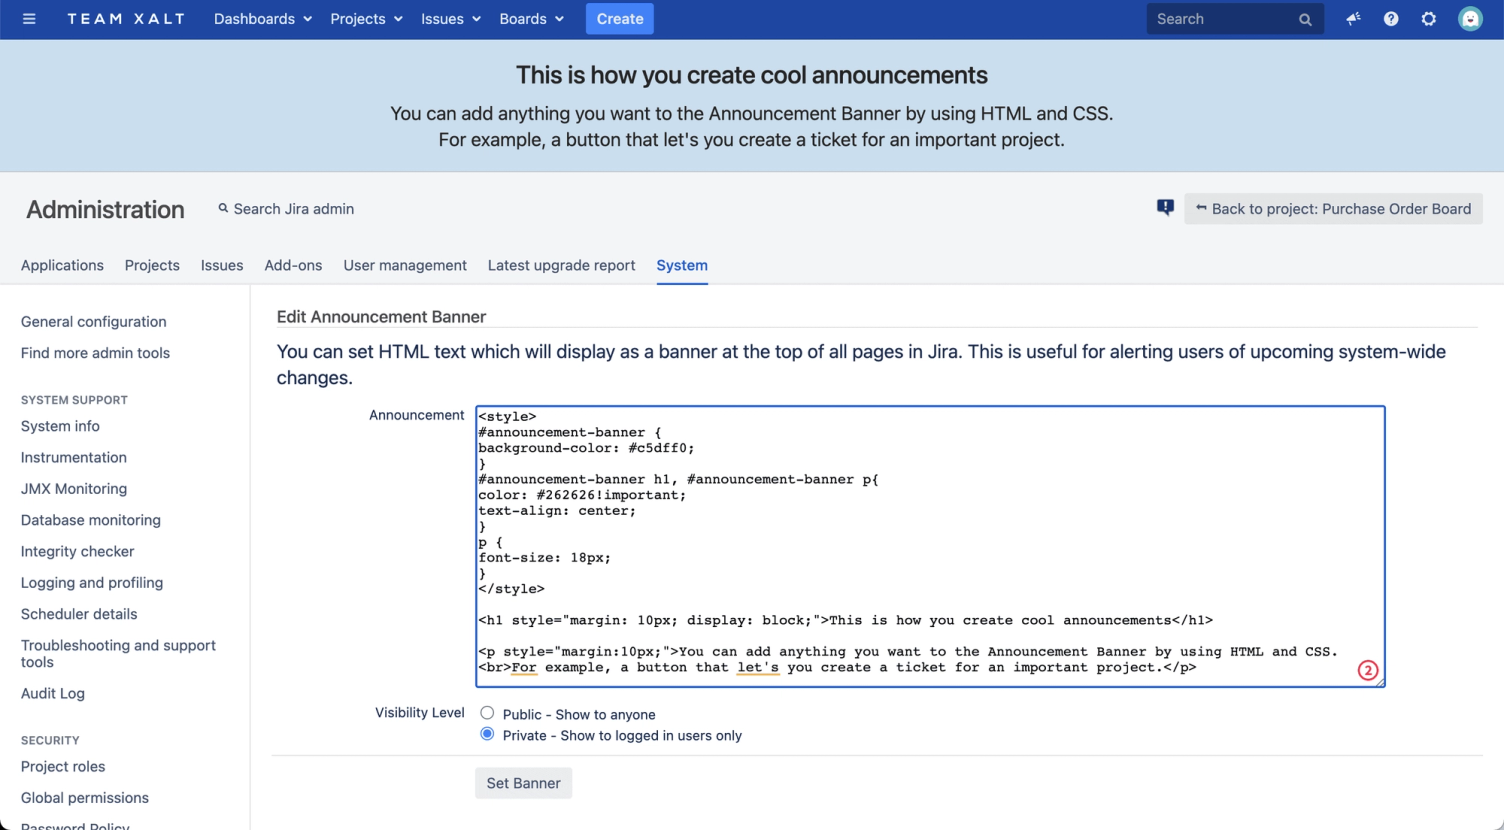
<style>
#announcement-banner {
background-color: #c5dff0;
}
#announcement-banner h1, #announcement-banner p{
color: #262626!important;
text-align: center;
}
p {
font-size: 18px;
}
</style>

<h1 style="margin: 10px; display: block;">This is how you create cool announcements</h1>

<p style="margin:10px;">You can add anything you want to the Announcement Banner by using HTML and CSS.<br>For example, a button that let's you create a ticket for an important project.</p>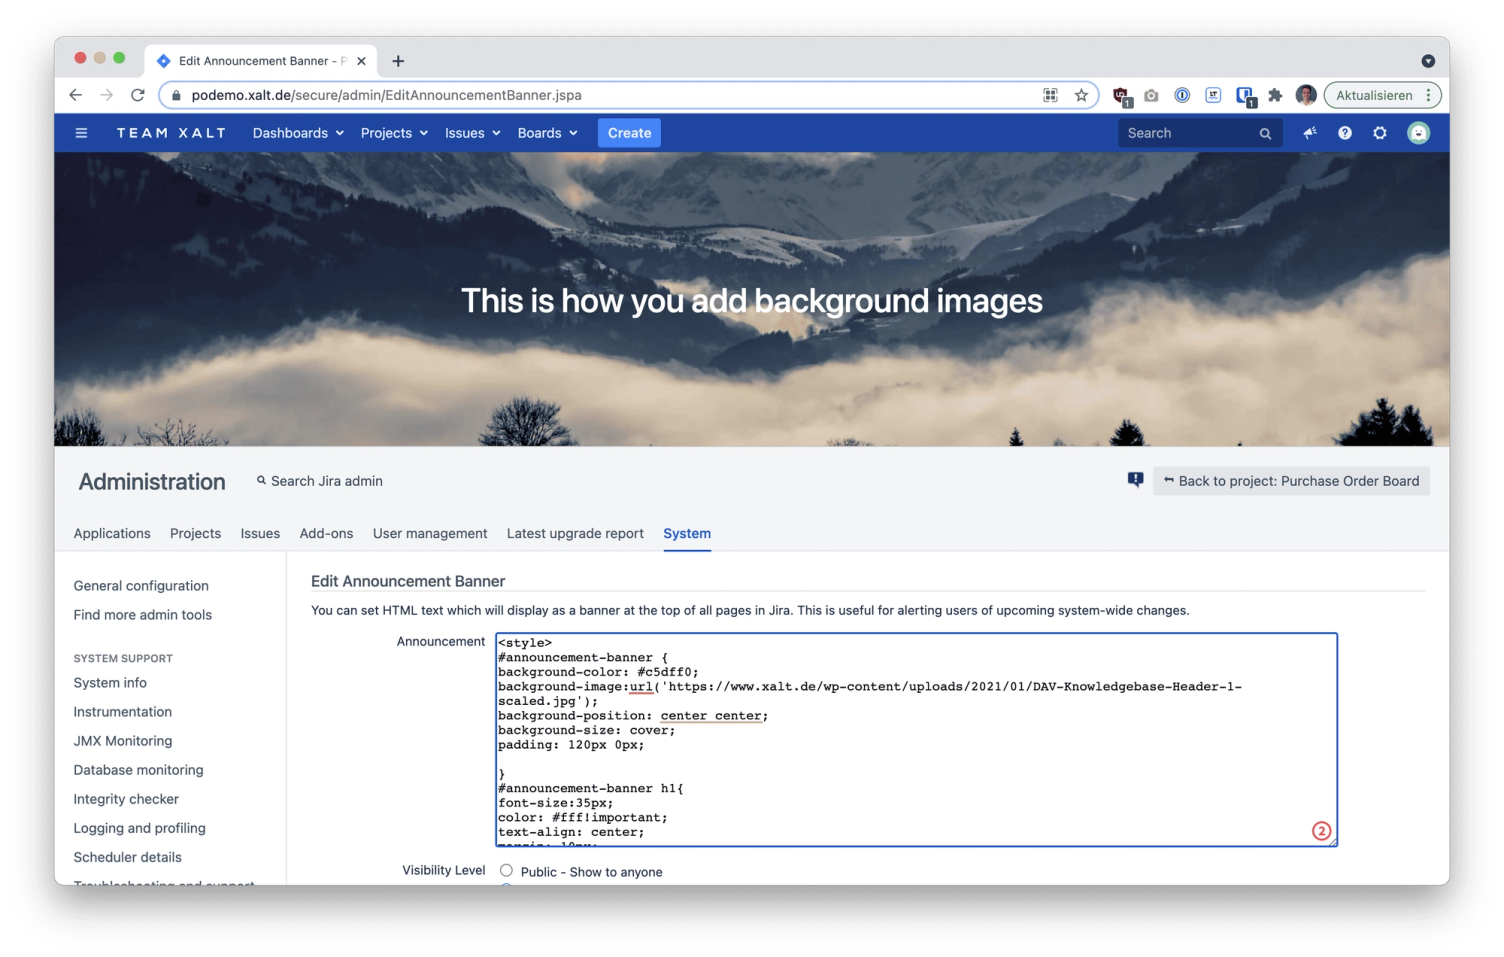
Adding images and background images
To add background images to your banner, the image has to sit on a server you can reach. That could be your content management system (CMS), your website or your company cloud. The only thing that matters is that your Jira can reach it. Upload the image and note down the URL. In our case we use an image from our WordPress instance.
<style>
#announcement-banner {
background-color: #c5dff0;
background-image:url('https://www.deinedomain.de/hintergrundbild.png');
background-position: center center;
background-size: cover;
padding: 120px 0px;
}

#announcement-banner h1{
font-size:35px;
color: #fff!important;
text-align: center;
margin: 10px;
display: block;
}
</style>

<h1>This is how you add background images</h1>
Pro tip: with the extra CSS box-shadow: inset 0 0 0 2000px rgba(0, 0, 0, 0.3); you can lay an overlay over the background image and make the text easier to read.When you do use a background image, watch that it does not take up too much room – after scrolling, the banner sits behind the other UI elements.
One more thing you can do as a Jira admin: keep several code snippets as templates in a text file. Then you can swap the announcement banner, or the quick link, whenever you need to.
Summary – announcement banners and quick links for Jira
So: customising the announcement banner and adding quick links is straightforward, and you can shape it to whatever you need. A little CSS gives it a style of its own.
Need a hand configuring your Jira instances, or want to know what power is still sleeping in Jira? Our Atlassian consultants are happy to help. Just send us a message with your questions.